DIY Quart Tin Can Punch Lanterns
I like to do things BIG. So when it was time to make up some tin can lighting I said, to heck with Campbell’s cans and I headed to the hardware store. The paint section of the hardware store to be more specific. And there I convinced myself that quart paint cans were big enough and to leave the gallons well and good enough alone (but wouldn’t that have been SO awesome?!)
You may not have known it before now, but paint stores and departments very often carry empty paint cans. I think the idea is that if you buy a gallon and have a bit left you can store it in a smaller quart gallon. In fact, I’ve even done that on several occasions. It’s great because it does take up less space and seems less likely to harden for whatever reason.
But I’m getting sidetracked here… I purchased my quart paint cans and immediately went home and prepared to sit on my hands for about a week until everything in this little DIY came all together. You can make your very own lights, too! Feel free to use food tin cans or, heck, get after those gallon paint cans like I kind of, sort of, totally wish I had!
For this project you will need:
- tin cans
of some sort
- small hammer
- heavy duty punch (can be a nail or something you find at the hardware store or in the toolbox with a pointy end)
- candle light bulb light kit
- gigantic drill bit
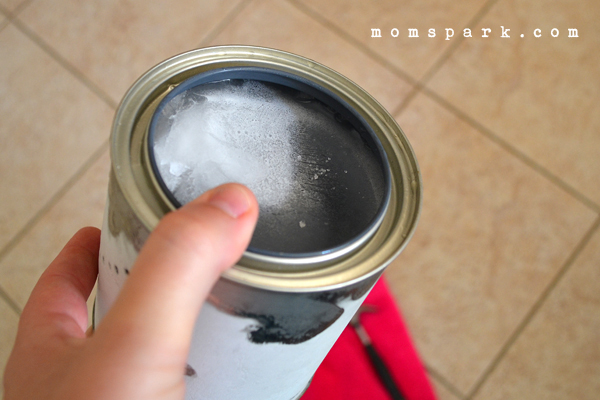
In order to punch your cans without denting the living daylights out of it, the moment you get home fill those suckers up with water and toss them into the freezer. After a day or so go in and fill them up again if there is an inch or two of empty space at the top. Give your ice as long as you can stand to because that will help it to really harden and melt more slowly. I’ve been told that this seriously works by a random stranger at the ammunition department in Walmart. And you always trust those guys, right?
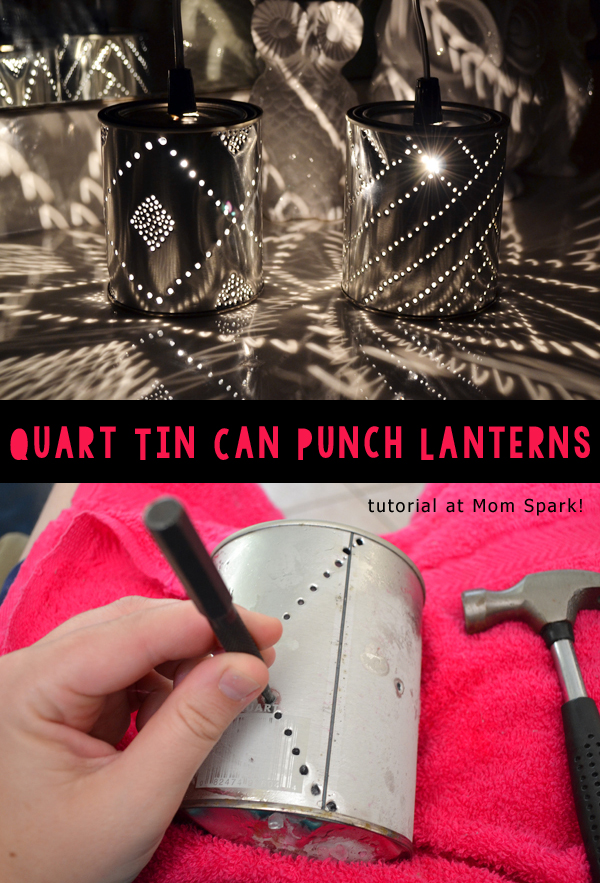
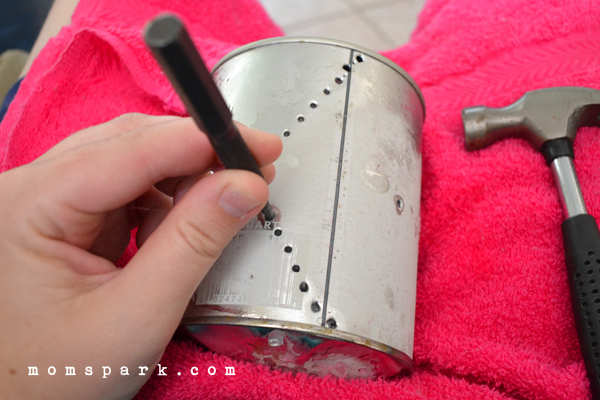
Take your sharp implement or nail (this is a nail punch from a set my dad ground the tip to a point for me) and small hammer and start whacking a pattern on there. I free-handed my designs but you can also draw them on paper, attach to the can and then follow the lines. You’ll get a more uniform design that way.
If you have the patience, let your ice thaw the old-fashioned way when your punching is done. I found that punching early in the morning when the day is naturally coolest worked best for me. In the evenings, though I was inside, the ice melted much faster and required an hour of freeze time after about 10-15 minutes out. When I worked in the morning, I could punch the entire can in just one sitting.
If you don’t have patience (like me, obvi) run some water into your can to melt the ice out.
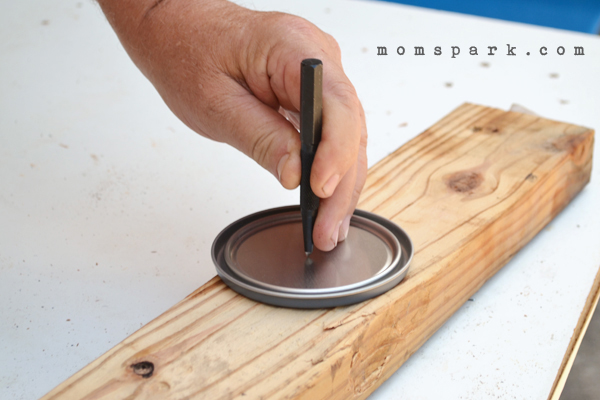
Take your lid to your can and punch a hole in the very center.
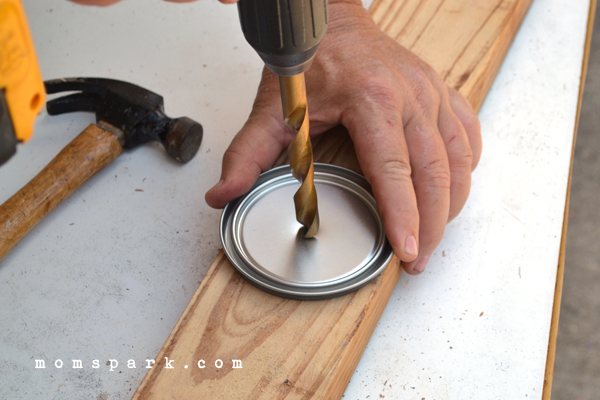
And use your big drill bit to make as big of a hole as you can. If you’re strong you can hold the lid with your hand but if you’re not you can use a vise to hold the lid steady. This hole may not be a perfect size, and that’s cool, but we’ll get to that in a moment.
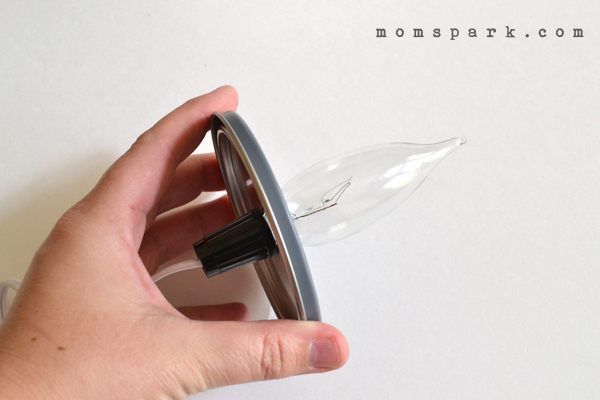
Take your light kit out and push the socket up to the OUTSIDE of the lid. Screw an appropriately sized light bulb into the socket through the lid. Plug your light in. Will it turn on? If so, awesome! Skip to the next pic. If not, your bulb isn’t making a good enough connection inside because the hole you made is too small. Simply get something hard, like a screwdriver, and rout around the inside of the hole to make it bigger and bigger. It’s slow work but it does work. Try the light again and when it finally lights up, it’s time to move on!
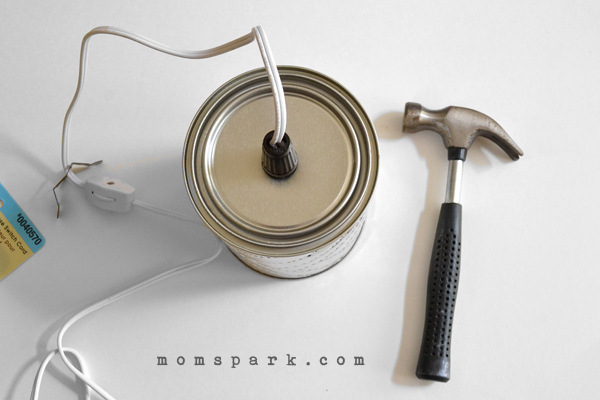
To finish place the lid on top and tap into place with a hammer. Now when your light bulb burns out, you’ll need a paint key or a screwdriver to get into the can to replace it.
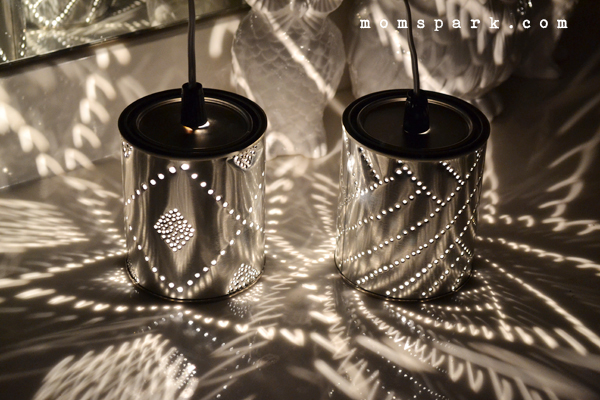
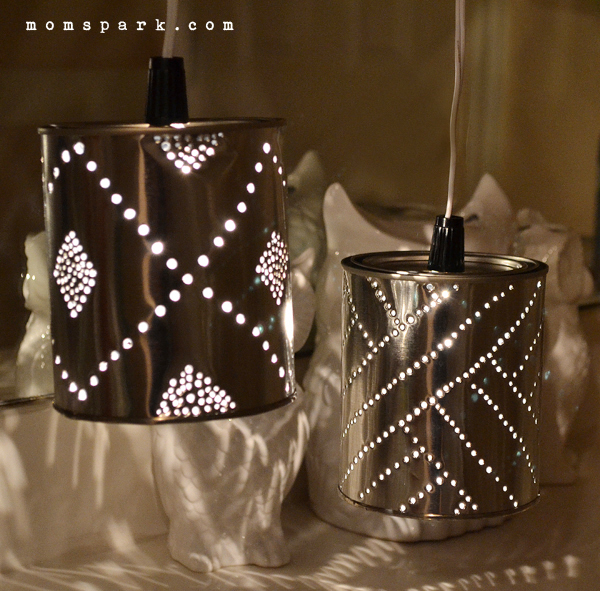
These lights are really meant to be hung as seen in the pic above, but my photography skills aren’t good enough to catch something that is largely in the dark and slightly swaying, so please be patient with the next few photos… I just want you to see them hanging as they are meant to!
Pair together they make a great set!
And my mother has her eyes on three to make a neat, pendant set for the inside of her home which will be FAB!
And know, the closer you place these guys to surfaces, the greater their patterns appear from your hard work at punching!
Well, that’s it for today! Grab that hammer and nail and save those chicken noodle soup cans and you’ll have some of the neatest lightings on the block!
A crafter since her earliest years, Allison spends a little time every day making something. She crafts, sews, paints, glues things onto other things, and is a firm believer that a life spent creating is a life worth living. Visit Allison’s blog, Dream {a Little} BIGGER.






12 Comments on “DIY Quart Tin Can Punch Lanterns”
Love, love, love these! Where can I find the light sockets?
Where might I find different light kits? I’ve looked and look and the only thing that shows online are light kits for photography. I’m looking for different kinds and different sizes. Little help here!
Have you tried Amazon?
Hey, Megan – these actually came from Lowe’s if I remember correctly but you can also purchase similar kits at Hobby Lobby and Michael’s. This one from Amazon is as identical to what we used as I can find online!
Thanks! Me and my son are going to make lanterns for my wedding. Great inspiration.
Pingback: SUPER FUN & SIMPLE DIY UP-CYCLED TIN CAN CRAFTS – Mis and ME
Pingback: 20 Awesome Ideas & Tutorials for Upcycling Tin Cans - Crafts Booming
Thank you very much
You can also drill the hole on the bottom of the can and put the bolt through it and have the other end of the can opener where you have removed one of the lids and it makes it much simpler to change your bulbs and you don’t have enclosed bulbs but they are open
Wow! Great idea.
I have been making lamps out of pear gourds for months. Huge steep learning curve and a huge space to cover. I was looking for dot stencils and saw yours. My husband wires the gourds for me and they ARE beautiful but too time-consuming for my DIY Xmas list. I bet the smaller cans would make awesome luminaries.
That is amazing!
Pingback: 27 Creative DIY Tin Can Ideas