Shoe Makeover: Graceful Lace Flats
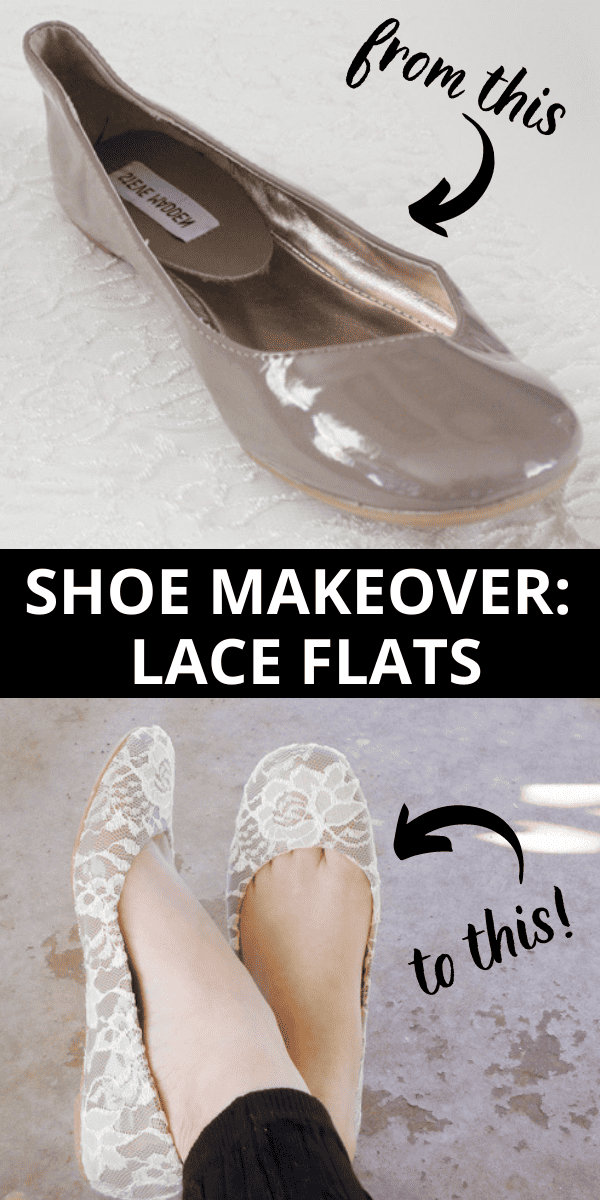
I have a thing with lace and shoes. A really, really big thing. In fact, this is the THIRD pair of shoes that I have made lacy this year.
On the one hand, I will always have a pair of lace shoes to perfectly complement any outfit. On the other hand, who really cares? Lace is awesome and on-trend this fall and if you don’t have any lacy shoes, yet, you need to listen up!
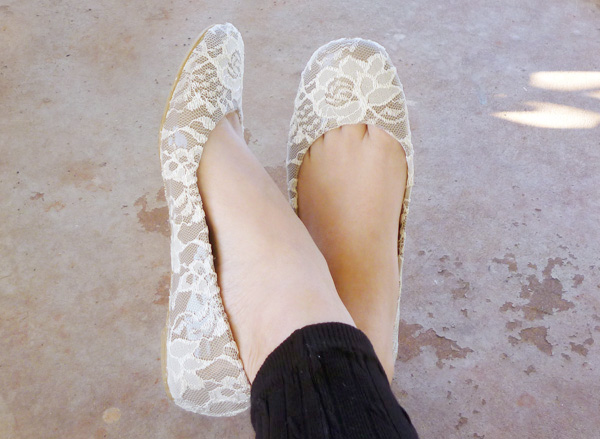
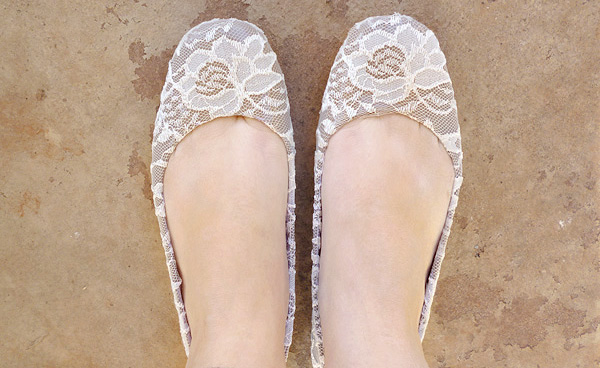
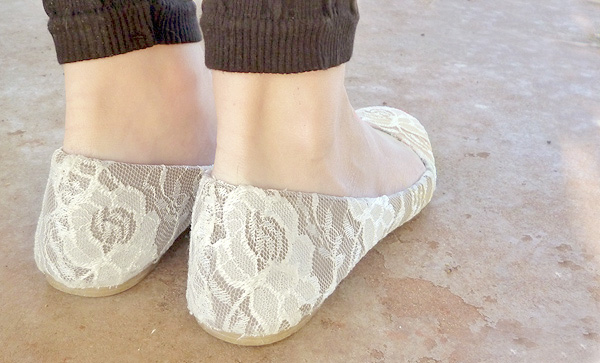
I feel like I have really perfected my lace covering technique. I’ve learned from past mistakes and I was informed that these shoes look just like I bought them at the store. Not kind of DIYed or anything, but honestly and truly from the store awesome. So if you want to learn from my experience and make a pair of laced up shoes with me you will need:
- shoes
- lace fabric, approximately 1/4 yard
- spray adhesive
- scissors
- Mod Podge & small brush
- utility knife
First take and cut a portion of your lace that is generously larger than the actual shoe.
Turn your cut lace upside down (pretty side down, less attractive side up) and give a nice layer of spray adhesive. Allow sitting a moment to become tacky.
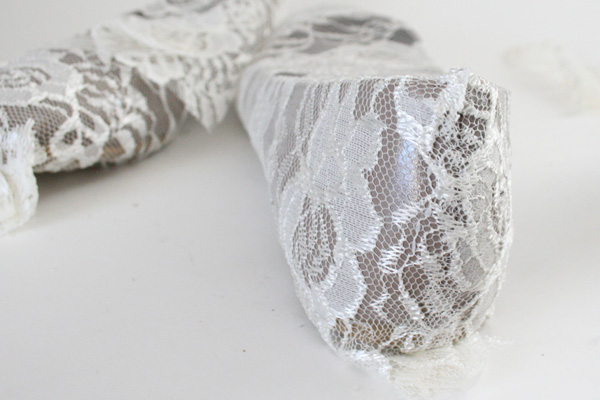
Starting with the toe portion of the shoe, place the lace with a good focal point on your shoe. Smooth the lace down and around the entire toe and sides of both shoes. Allow drying for approximately one hour.
When you get to the back of the shoe, cut the lace directly down the middle. Take one side and pull it inward and trim any overlap with the center of the shoe. Glue down.
Take the other side and trim so that the lace is just overlapping the first piece. Glue down.
Come back around with your spray adhesive and tack down anything that didn’t stick well the first go.
Continue with this step as soon as the lace is no longer tacky to touch, or if when touching the lace it doesn’t try to pull up with your finger. Run along the sole/shoe upper with a small brush and Mod Podge. Apply generously. This step is going to stiffen up your lace so that it will be easier to trim and prevent any unraveling after trimming.
Take your utility knife and run along the seam that connects the sole to the upper. Areas where the lace is thicker and more detailed will take a bit more pressure. Take care that you don’t push so hard that you cut through the shoe.
Go slowly on this step. The quality of your trimming is going to affect whether your shoes look fabulous or homemade.
Use your hot glue gun to trace just inside of the shoe in spans of about 3 inches. Turn the lace over into the shoe and tamp down on the hot glue to set. Quickly wipe away any excess.
Since hot glue dries so quickly, after the last step your shoes are pretty much wearable. Keep a close eye on the inside where you used the hot glue it may wear a bit quickly if you kick off your shoes (like rubbing one foot against the other). It’s no big deal if it does come loose, though. Just tack it back down!
See you next week…
A crafter since her earliest years, Allison spends a little time every day making something. She crafts, sews, paints, glues things onto other things, and is a firm believer that a life spent creating is a life worth living. Visit Allison’s blog, Dream {a Little} BIGGER.






27 Comments on “Shoe Makeover: Graceful Lace Flats”
These turned out stunning!
Thanks, Meghan! Allie is a rock star!
ADORABLE!
Love these! They are so pretty!
So pretty! And a great tutorial 🙂
Yay! Happy you like it. 🙂
Wow. Thsi would be a great way to spruce up shoes with some scuffs.
Exactly!!
hi !! I loved this tutorial, if I had known this before, i wouldnt have thrown out to garbage a few pairs that were so old I thought I would never use again!
anyways… I have 1 question, how do i find this “mod podge” in Mexico??
is it like… glue or something?
or anything similar that i could find in Home depot??
thnks a lot !
hugs!
Hey, Sophie. Mod Podge is sold at hobby and craft stores. If you can’t find it you could also use wood glue. I’ve heard good things about using it as a quick substitute! Good luck 🙂
I have a pair of black flats that I would like to do with this. Black shoes are my go to color with outfits! What color lace would you recommend to go over my black flat?
Hey, Sara! I did some black flats earlier this year and I used bright teal lace. They wound up being really fun. But if you tend to go more muted, I’d probably use a medium to dark gray lace. You’ll have the difference in contrast but it won’t be all up in your face!
Pingback: Link Love: Elegant Lace Crafts | FaveCraftsBlog
What a cute project! I love it so much that I decided to feature it in our roundup of cace crafts! Check it out here: http://www.favecraftsblog.com/lace-crafts/
Thanks so much for the share, Julia!
lovely
If you want to obtain a good deal from this paragraph then
you have to apply these methods to your won weblog.
Pingback: DIY: Lace Ballet Flats from momsparks.com | Mooday
Pingback: 25 Amazing Mod Podge Crafts | Mom Sparks - A Blog for Moms - Mom Blogger
This looks so pretty! I noticed your shoes are of patent leather. Could I also do this on cloth/fabric flats? Thanks so much!
Pingback: 50 DIY Shoe Makeovers! | Mom Sparks - A Blog for Moms - Mom Blogger
Pingback: DIY Art Projects | The Right-hand Corner
Do you mind if I quote a couple of your articles
as long as I provide credit and sources back to
your webpage? My website is in the very same niche as yours and my users would certainly benefit
from a lot of the information you present here.
Please let me know if this okay with you. Thanks!
Amazing! I made my first “trial” pair… I want to try to make a pair for my wedding. Used plum lace over ivory. Suede changed colors permanently with the Mod Podge so I guess I’ll have to use patent 😛
https://www.facebook.com/photo.php?fbid=10107383054526434&set=pcb.10107383056647184&type=1
Or this for public I guess: https://www.facebook.com/photo.php?fbid=10107383054526434&l=f9c416f241
Pingback: – Decorate your shoes